Exacta-Guide

The Precision Tool Guide That ACTUALLY WORKS !
Congratulations, you have selected the tool guide that will save you money as well as valuable time to measure and cut your wood projects. Exacta-Guide was designed to solve the problem of making straight, repeatable cuts to dimensional lumber. The patent pending locking design keeps Exacta-Guide straight and tight on your wood project, allowing you to make cuts with confidence. The base unit helps cut wood up to 16” (40cm), and with extensions up to 97” (246cm). Exacta-Guide works with nearly all makes and models of circular saws, routers and jigsaws.
Tailoring Exacta-Guide to Your Tools
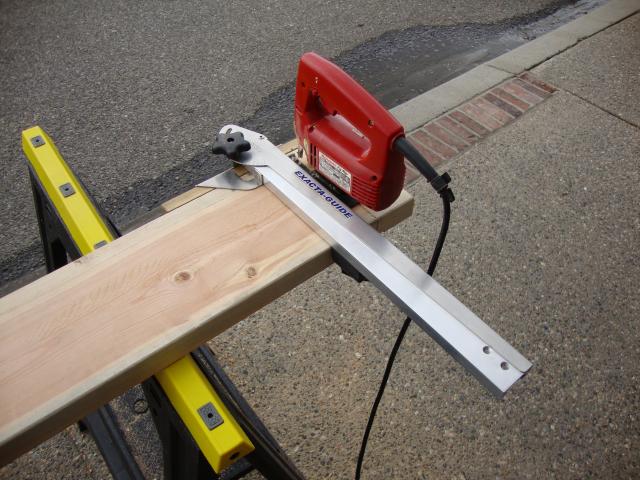
Using this 2x6 you can tailor your Circular Saw, Router and Jigsaw, without removing your Exacta-Guide.
Circular Saw - Align your circular saw against the Exacta-Guide as shown, and cut through both the 2x6 AND the Wood Guide on the Exacta-Guide. The end of the Wood Guide is now a reference point for all future circular saw cuts.
Router
Using a standard dado blade in your router, set the depth for approximately 3/16th of and inch. Align the router against the Exacta-Guide, and cut through the 2x6 AND the Wood Guide. You now have a future reference mark for router dado cuts.
Jigsaw
Align your Jigsaw aganst the Exacta-Guide, and cut through both the 2x6 and only 1/8th of an inch into the Wood Guide.
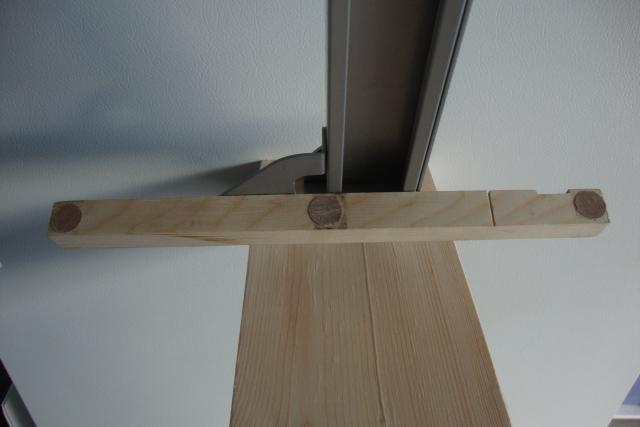
Round Rubber Disks
After all tailoring cuts, install the 3 round disks to the inside of the Wood Guide. These provide additional grip and hold your Exacta-Guide in place.
For all future cuts, simply align these cuts to your pencil mark, lock on Exacta-Guide, and make your cut with confidence.
ASSEMBLY & SETUP
The design of Exacta-Guide allows you to customize the Wood Guide to your tools for future reference. After you make the initial saw cut to customize the Wood Guide, you will be able to make fast accurate cuts every time. For assembly & setup you will need a #2 Philips screwdriver, pliers, rough piece of wood such as a 2x6, Circular Saw, Router with dado bit, and Jigsaw. Always wear proper safety equipment and consult your power tool user manual for proper use.
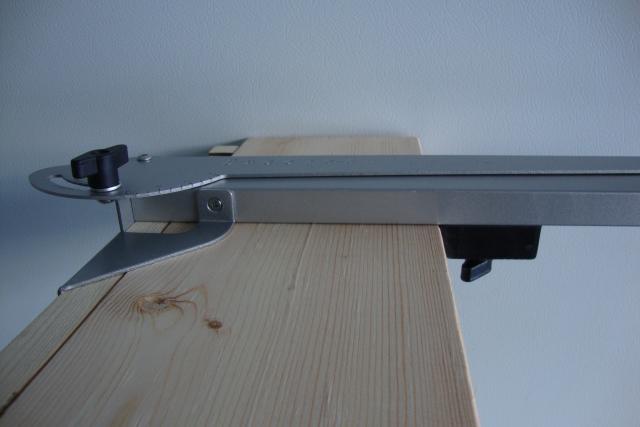
Assembly
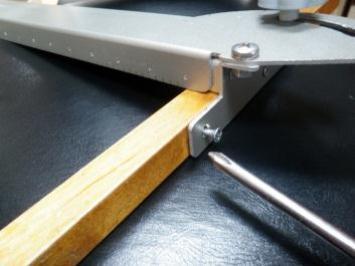
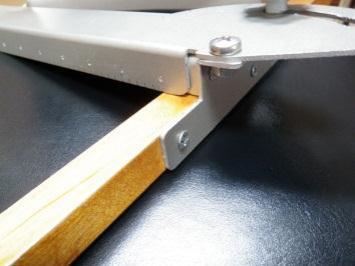
Install the 15” Wood Guide by using the 3 wood screws to the end bracket of the Exacta-Guide. The Wood Guide is pre-drilled. Be sure the longer side of the wood is on the side where the tools run along. Tighten until firm
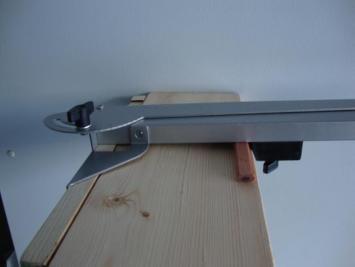
Locking Exacta-Guide On
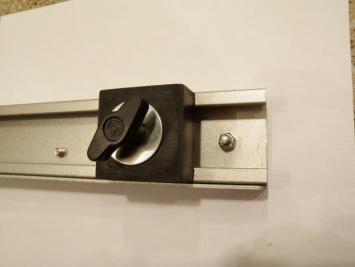
Insert spacer (carpenters pencil) under the Exacta-Guide as shown to lift the back end slightly. Slide the rubber mount up tight with the wood, and tighten the wing nut. Remove the spacer, while holding the wood guide firmly against the wood and press down at the rubber mount point to lock Exacta-Guide on. You are now ready to tailor your Exacta-Guide for your tools.

1.
2.
3.
PACKAGING
1 Exacta-Guide Base Model, 1 15" Wood Guide (Pre-Drilled), 3 Wood Screws (to attached Wood Guide and Bracket),
3 Circular Rubber Disks, 1 Spacer (Standard Carpenter Pencil), 1 Screw & Nut
4.
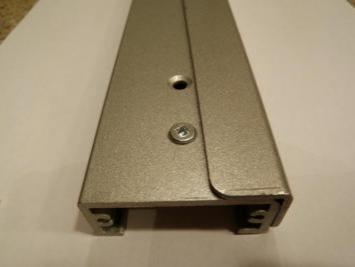
Rubber Lock Stop
Insert the screw and nut into the back end of the Exacta-Guide as shown. this prevents the Exacta-Guide rubber lock from sliding out.
5.
Safety
Always wear safety equipment when operating power tools with Exacta-Guide. Keep clothing away from cutting area. Ensure the power cords do no come in contact with your blades during use. Ensure your wood is properly supported while using Exacta-Guide. Follow your saws written safety instructions during use. For any questions, please contact us.